
Git branches in GitHub Codespaces
Learning intentions
In this lesson, you will learn how to create and manage Git branches in GitHub Codespaces.
- Explain what a branch is and why developers use branches.
- Identify the current branch in Codespaces.
- Create a new branch from inside the Codespaces editor.
- Switch between branches safely.
- Explain what commit and stash mean.
- Publish or sync a branch so other people can see your work.
What is a branch?
A branch is a separate line of development in a Git repository. It lets you work on a new feature, fix a bug, or try an idea without changing the main version of the project.
For example, instead of editing main directly, you might create a branch called feature/login-screen and do your work there. When the work is finished and tested, it can be merged back into main.
Branches are useful because they help you:
- keep unfinished work away from the stable version
- work on more than one task at a time
- collaborate without everyone editing the same files on the same branch
Before you start
In GitHub Codespaces, some setup is already done for you:
- the repository is already open in the editor
- Git is already available inside the Codespace
- your work is connected to a GitHub repository
That means you do not need to install Git yourself or open a local folder first in desktop VS Code.
You do still need:
- a GitHub repository
- a Codespace opened for that repository
- permission to push branches to the repository, if your class workflow allows it
Finding the current branch
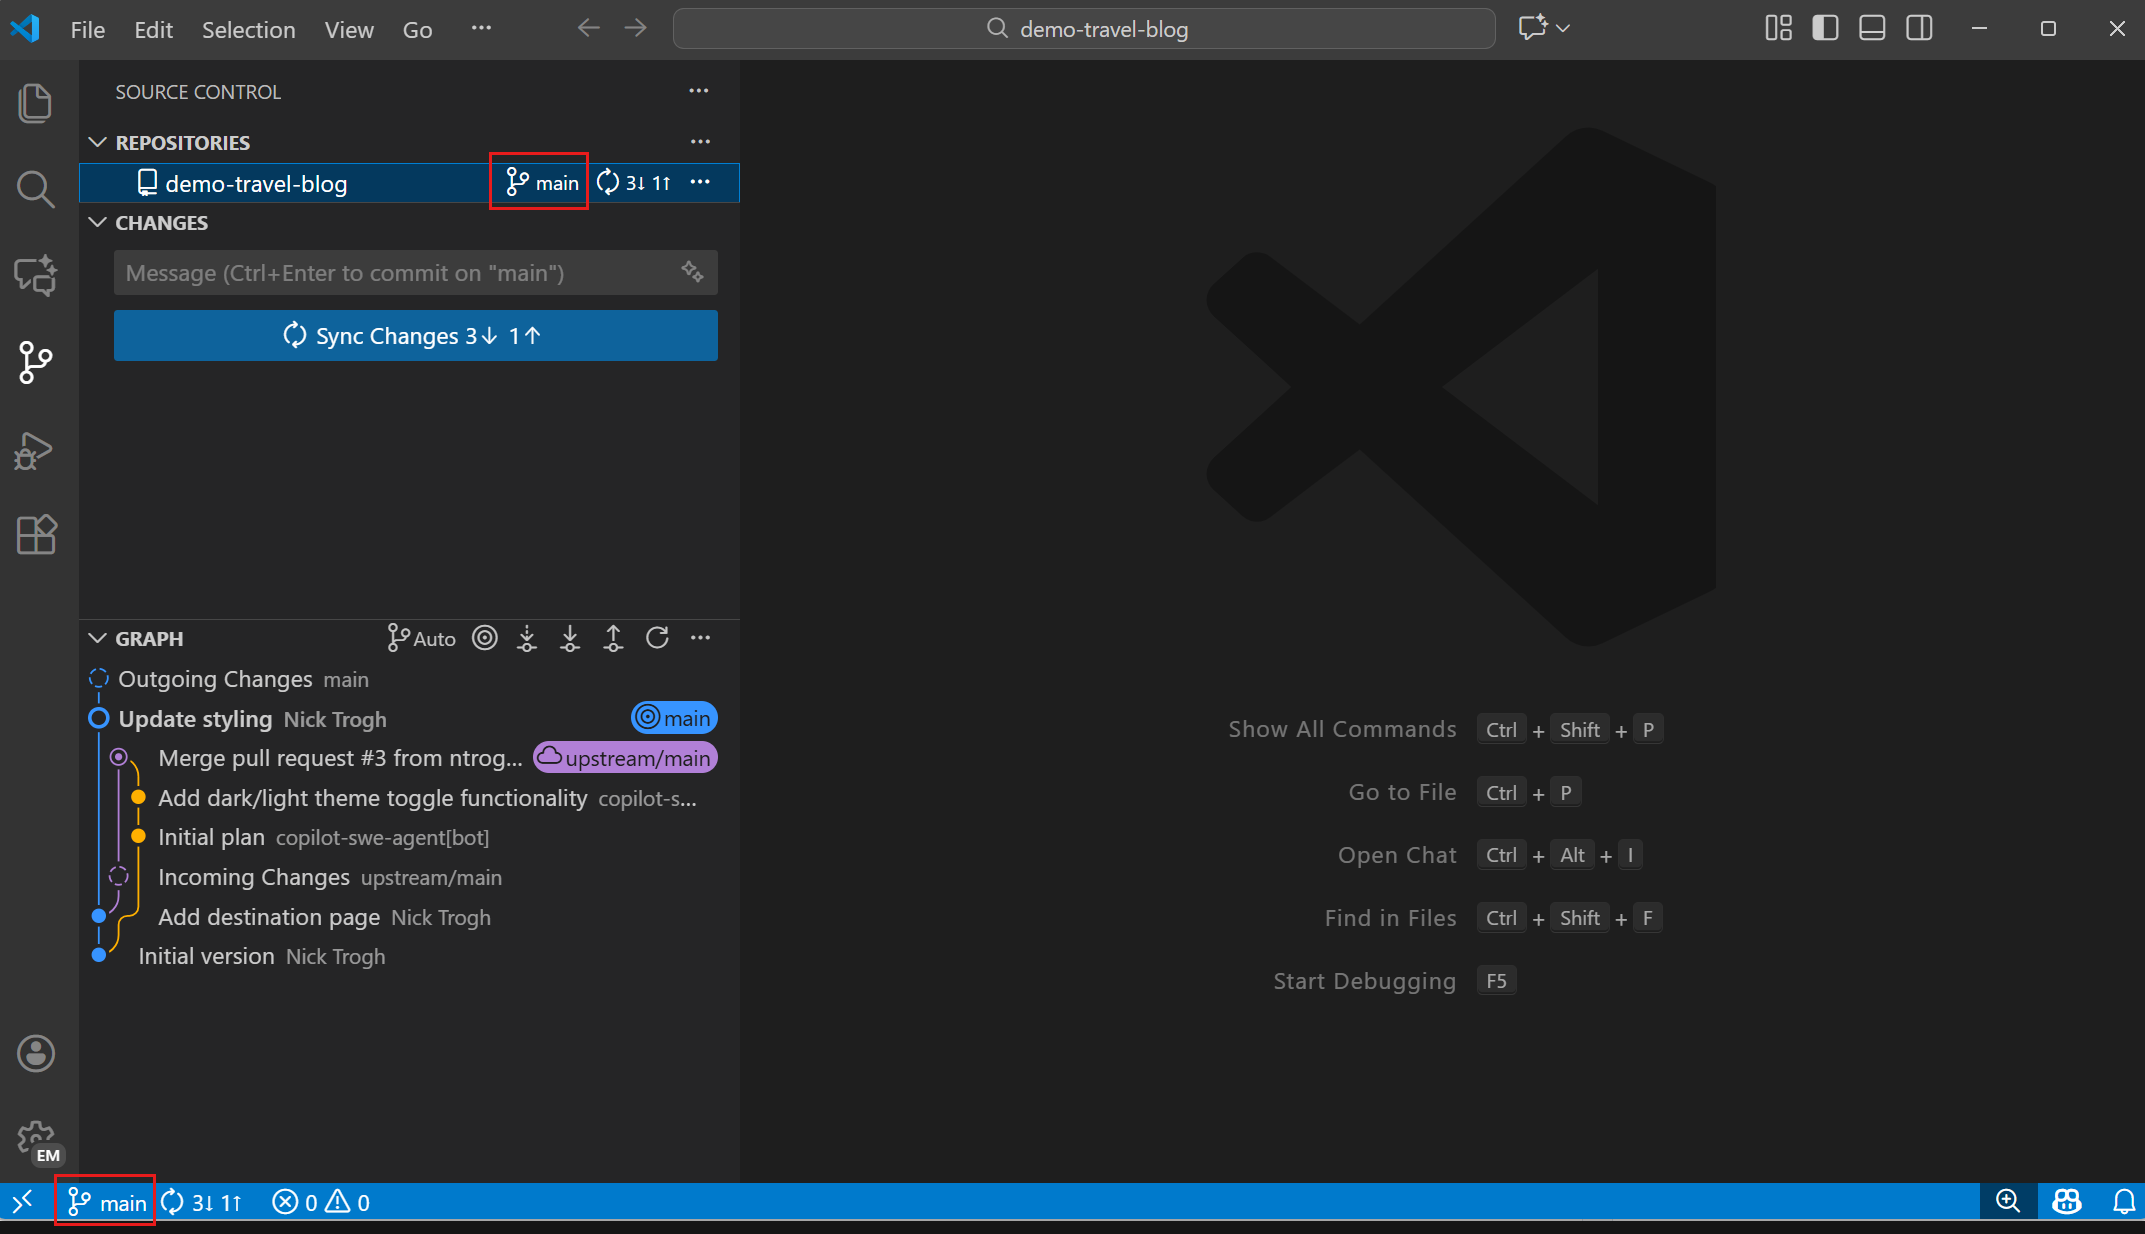
Codespaces shows the current branch in the Status Bar at the bottom of the window. Selecting that branch name opens branch actions such as switching branches or creating a new one.
Creating a new branch
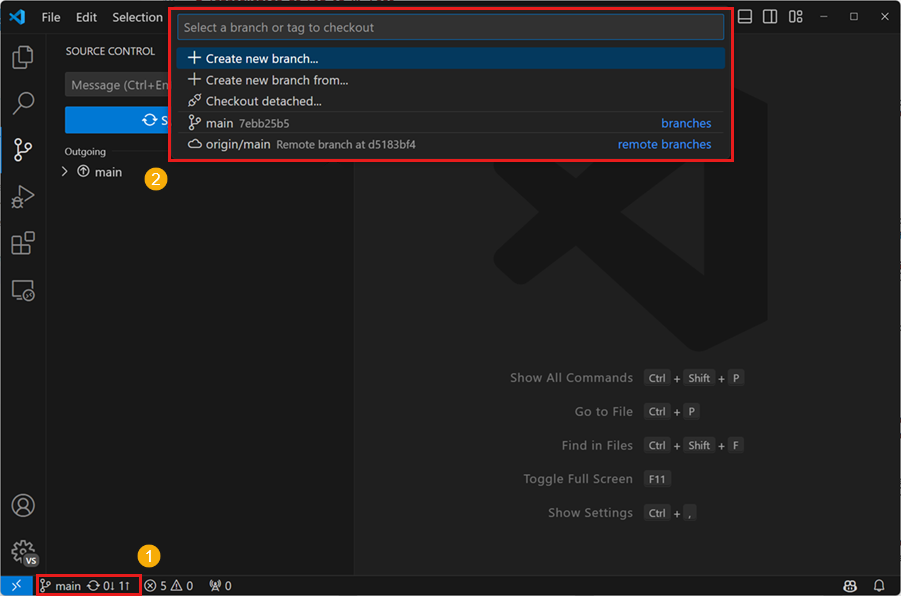
In Codespaces, the easiest way to create a branch is from the branch name in the Status Bar or with the Command Palette.
Choosing a good branch name
Branch names should be short but clear. A good branch name tells other developers what the work is about.
Good examples:
constants-variablesrevision-taskobject-oriented-task-01
Avoid vague names such as:
stuffnew-branchtest2
Reviewing changed files
Before you switch branches, check whether you have changed any files.
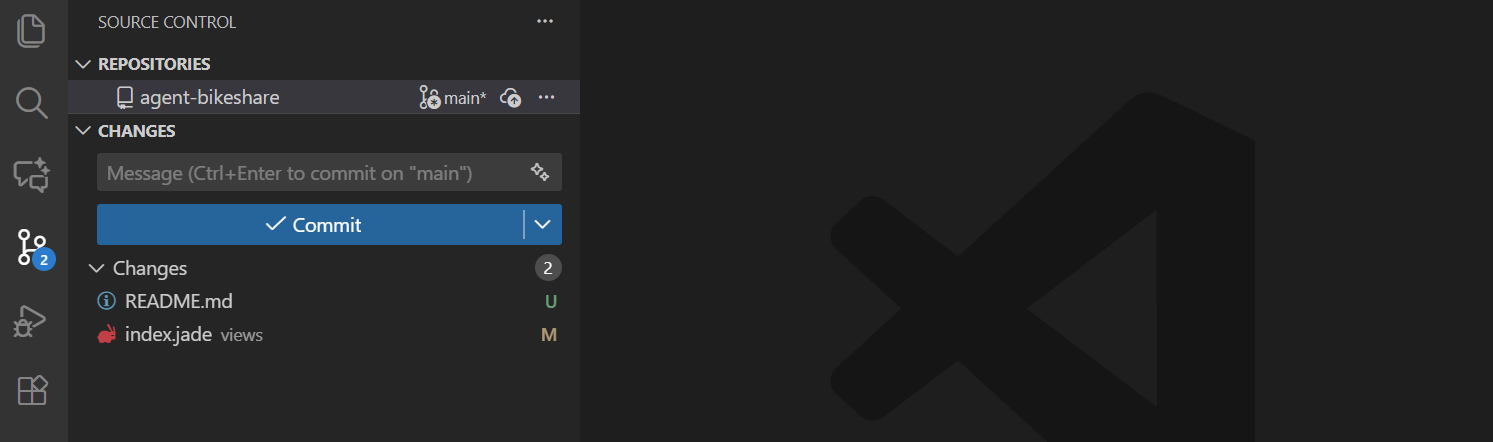
Note: autocommit has been enabled for your Codespaces, so this list may be empty or become empty whilst you are looking at it.
Switching between branches
Switching branches is also called checking out a branch.
What does commit mean?
A commit is a saved checkpoint in your Git history. It records a set of changes along with a message explaining what changed.
In practice, committing means:
- choosing which changed files should be included
- writing a short message such as
Add navbar links - saving that snapshot into the branch history
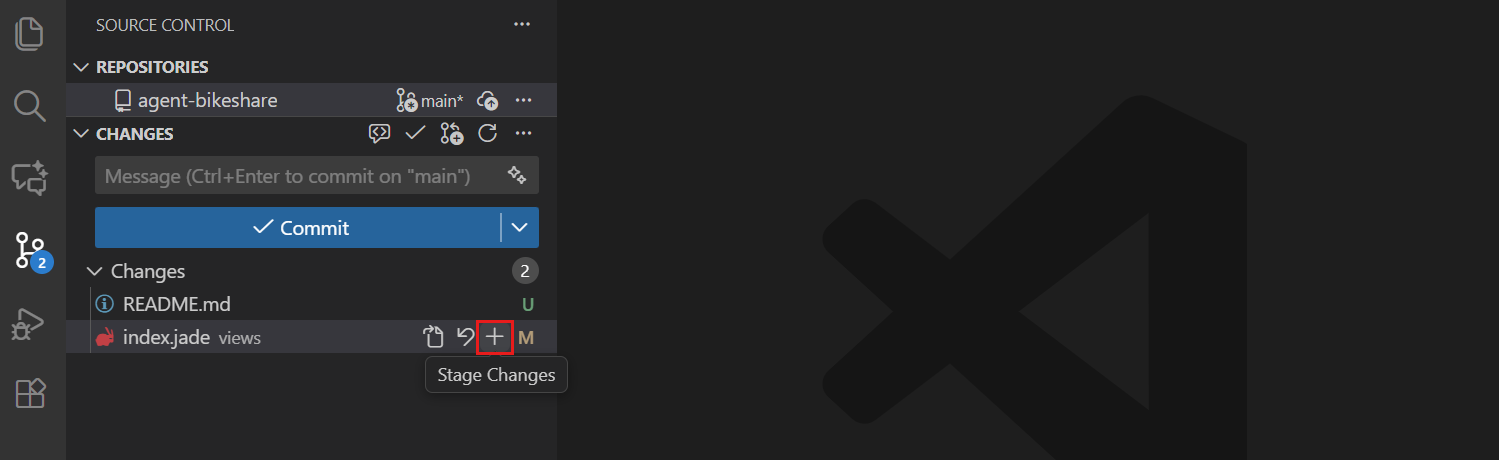
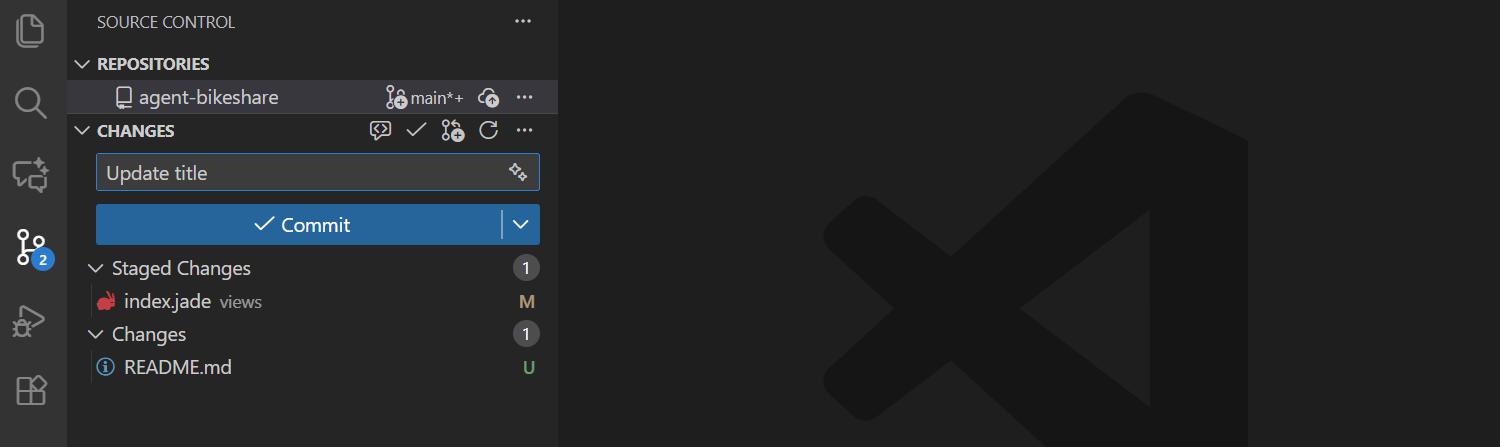
Only the files you have staged are included in the commit. If you forget to stage a file, that file stays outside the commit.
Note: autocommit has been enabled for your Codespaces, so this list may be empty or become empty whilst you are looking at it.
What does stash mean?
A stash is a temporary storage area for uncommitted changes. It lets you put your unfinished work aside so you can switch branches without losing it.
Use a stash when:
- you are not ready to commit yet
- you need to quickly change to another branch
- your work is incomplete or messy and should not go into history yet
You can think of a stash as “hide these changes for now, and bring them back later”.
Commit or stash before switching
If you want to move to another branch, decide which option makes sense:
- Commit if the work is ready to be saved in branch history.
- Stash if the work is unfinished but you want to come back to it later.
- Discard only if you are certain you do not need the changes.
For classwork, committing is usually better than stashing because it creates a clear record of your progress.
Publishing a branch
Creating a branch inside Codespaces does not automatically send it to GitHub.
To publish a branch:
- Create or switch to the branch in Codespaces.
- Make your changes.
- Commit your work.
- Use Publish Branch, Push, or Sync Changes when the editor offers it.
Publishing is important because it backs up your work and lets your kaiako view or review it.
Push, sync, and publish
These words are related, but not exactly the same:
- Push means send your local commits up to GitHub.
- Publish branch usually means create the branch on GitHub for the first time.
- Sync changes usually means pull any new remote changes and push your local commits.
For students, the important idea is simple: after committing on your branch, you usually still need to send that branch to GitHub.
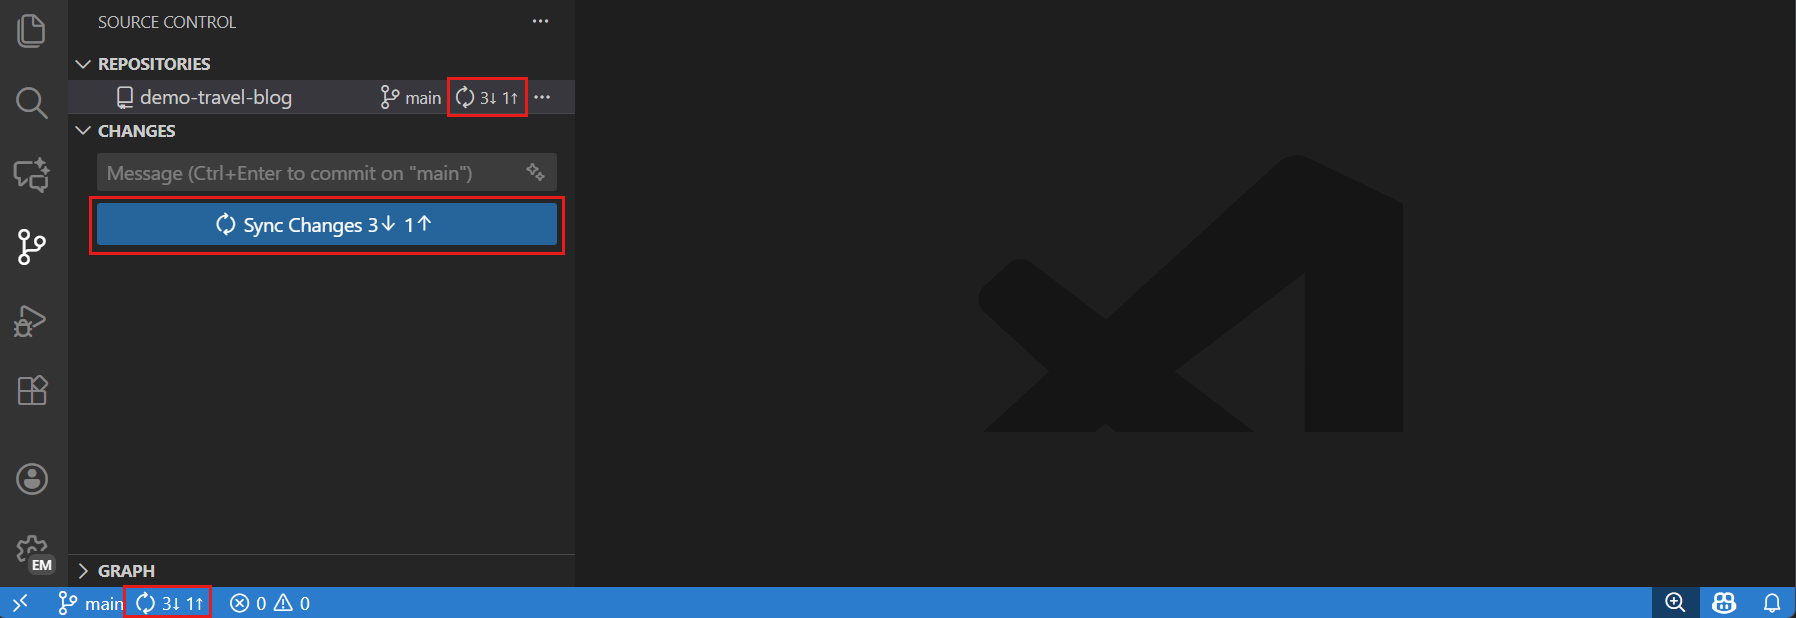
A sensible branch workflow
One simple workflow is:
- Start on
main. - Create a new branch for one specific task.
- Do the work and check Source Control for changed files.
- Commit regularly, or stash if you must switch away from unfinished work.
- Publish or sync the branch to GitHub.
- Open a pull request or merge it back later.
This keeps each piece of work organized and easier to review.