Introduction to programming
Learning intentions
Introduction to programming

Programming is a fundamental part of software engineering, which is a field of engineering relating to designing, writing, and testing software
As part of this course, you will take your first steps to becoming a software engineer!
Before we start learning about programming, let’s get familiar with the standard against which you will be assessed
AS92004: Create a computer program
Students are able to create a computer program
Paetae/A: Create a computer program
- using a suitable programming language to construct a program that performs a specified task
- testing and debugging the programming to ensure it works on expected cases
- documenting the program with comments
AS92004: Create a computer program
Kaiaka/M: Create a well-structured computer program
- using succinct and descriptive variable names
- documenting the program with comments that clarify the purpose of code sections
- testing and debugging the program to ensure it works on expected and boundary cases
AS92004: Create a computer program
Kairangi/E: Create a flexible and robust computer program
- using conditions and control structures effectively
- using constants, variables, or derived values in place of literals to make the program flexible
- testing and debugging the program to ensure it works on expected, boundary, and invalid cases
What is programming?
Programming is the process of giving instructions to a computer so that it can perform tasks

When we perform programming, we are writing down the steps we want the computer to take
Therefore, we need to start from the most basic steps, such as putting text on the screen, before we can create a fully-fledged program
About the Swift programming language
In this unit, you will learn how to create a program completely using programming code. To do this, we will learn the Swift programming language
Swift is a powerful yet beginner-friendly programming language that can be used in a wide range of applications
Swift is the main programming language used to develop modern Mac, iPhone, iPad, Apple TV, and Apple Watch apps. However, it is also available for Windows and Linux

Why do we learn Swift?
Unlike Python, which we used to use, Swift prevents some common programming pitfalls that can lead to a Not Achieved grade
It can suggest when problems need fixing and can even refuse to run your code if there is a serious issue, meaning you can detect issues and test your program more easily
If you take Digital Media and Design, you can use Swift on a Mac or iPad to develop Mac, iPad, and iPhone applications
Learning Swift will also help you learn other, similar languages such as Java, Kotlin, C#, and Rust
But I already know another language…
Don’t panic!
If you have already learnt another language, don’t panic. In the software development industry, nobody uses just one programming language. Learning more than one programming language isn’t hard; in fact, already knowing another one gives you a head start.
Swift looks familiar
Swift is a C-like language, meaning that much of its syntax is similar to C. Python, JavaScript, Java, Lua, etc. are also C-like languages. If you know any of those, you will find more similarities than differences!
If you would like a quick run-down of the Swift language syntax to help you feel more comfortable, take a look at Codecademy’s Swift documentation which breaks the syntax down into sections
Otherwise, let’s get started!
Let’s write our first Swift code! (I)
Let’s write our first Swift code (II)
What did we just do? (print())
- We used the print function, which is used to display information in the Terminal window
- The text that gets printed is called a
String. - This is how Swift can tell the difference between the word print used for the function and the words “Hello, world!” to be printed
- Strings are always wrapped with double quotation marks
print("Your message here.")Comments
Our code can rapidly become confusing, even after writing just a few lines. To help with this, it’s often beneficial to include notes or reminders for ourselves or other developers.
(When they start marking your work, your kaiako especially will appreciate this!)
Comments clarify the purpose of the code However, they are not run as part of the program.
Let’s write our first Swift code (III)
What did we just do?
- We wrote a comment to describe what our code is doing.
- Our code is very simple, so there wasn’t much to explain
- However, your later code will become much more complex, so keep a hold of this skill.
- Remember to use double slashes for comments.
// This is a comment.Committing and pushing code
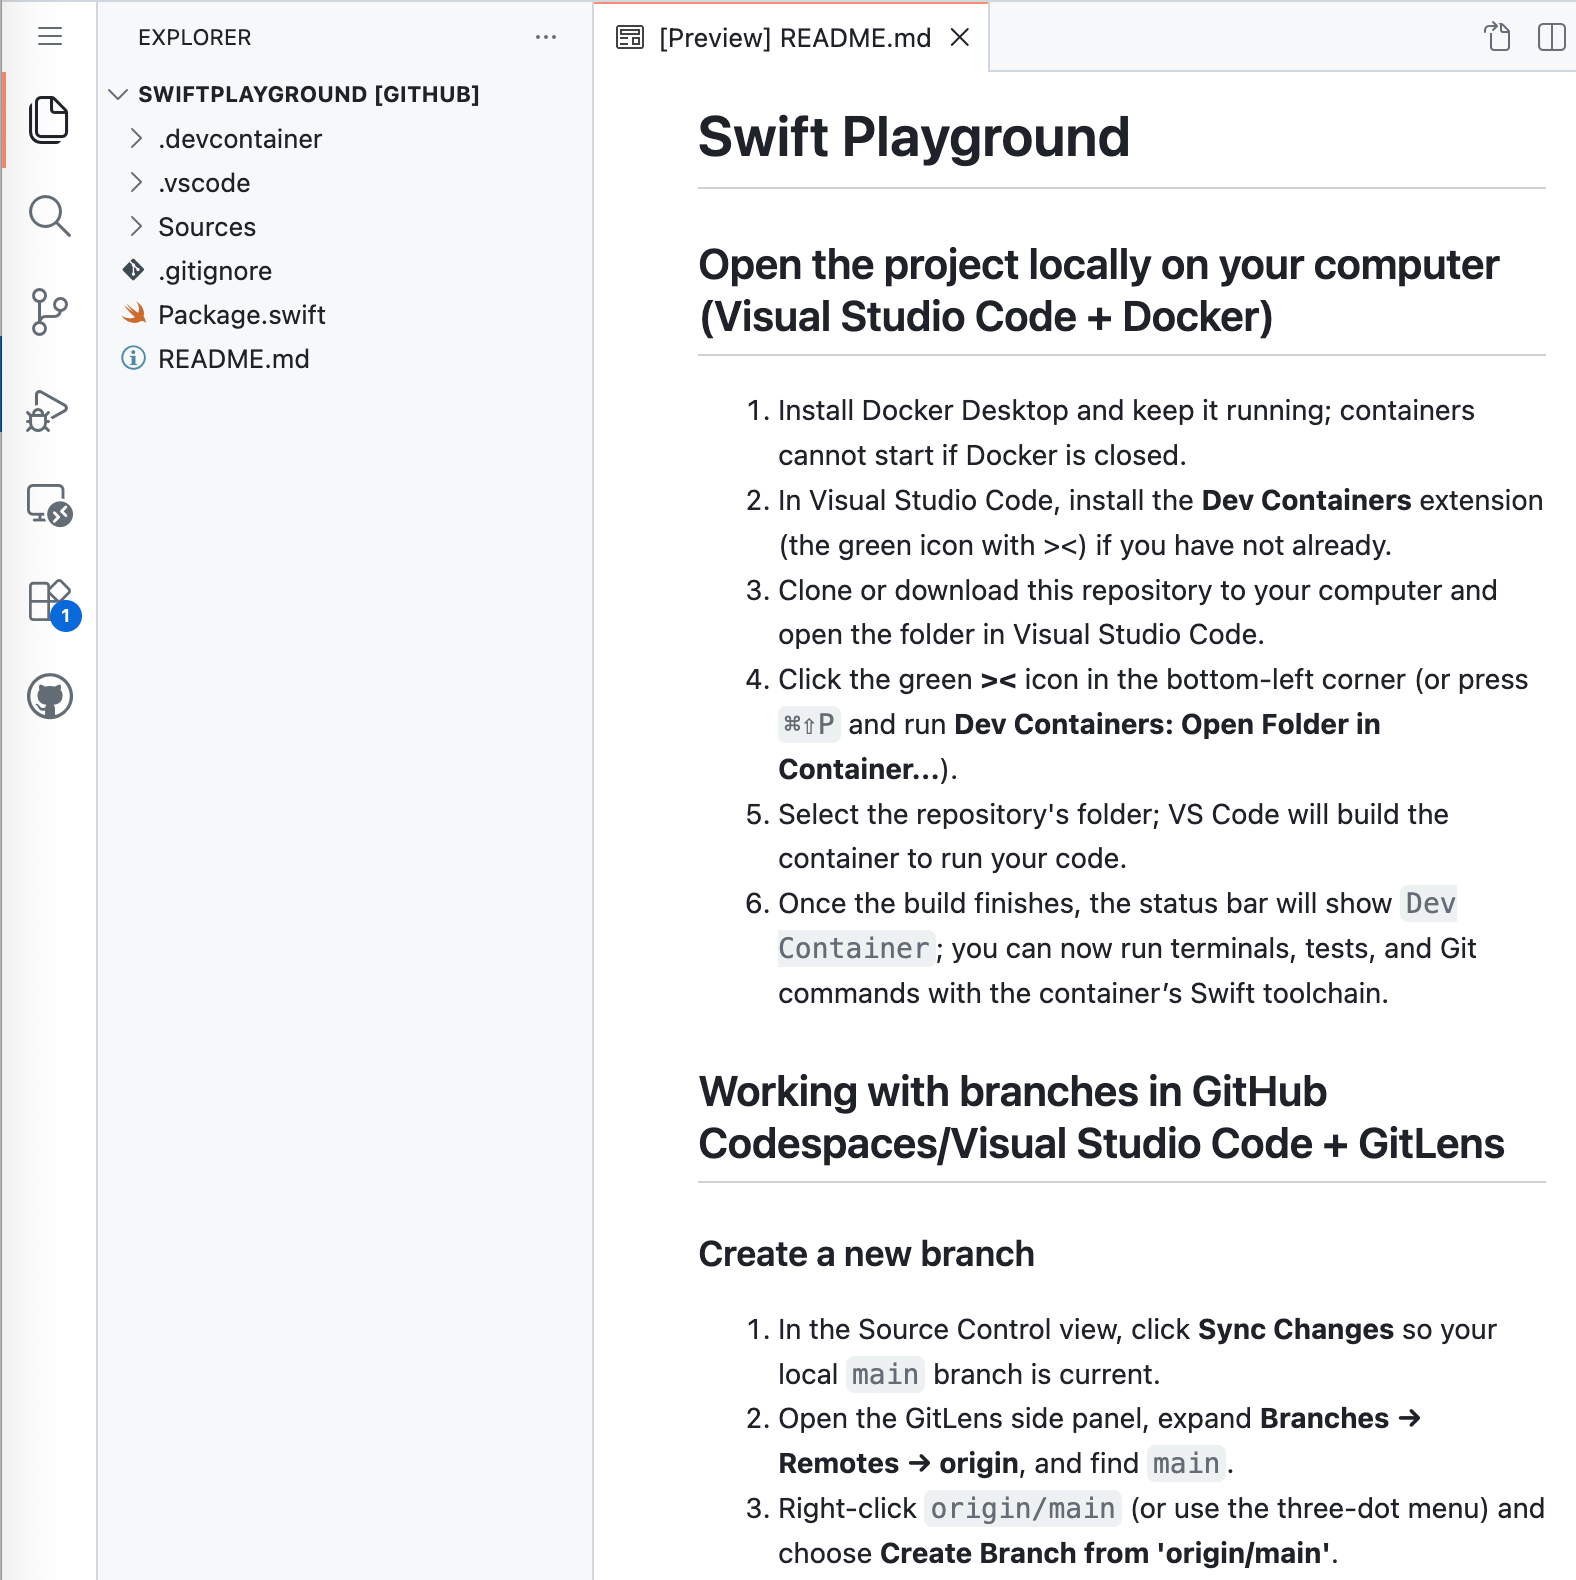
Creating a new branch
A branch is a separate line of work where you can build new code without affecting code you’ve already finished writing.
- Use branches to keep your work organised for each lesson, task, or feature.
- This also makes it easier to review your progress and merge work later.
Task
Hints:
- You will need to print SEVEN (7) characters across for each line of text to output your first initial as a block letter. Use spaces for the empty areas
- You can print an empty line by writing
print()without a string in it - Repeat the previous step for the next letter(s)
- Add comments before printing the first letter and before printing the second, explaining what your code will do :::